Introduction to Adobe I/O Events Webhooks
With Adobe I/O Events webhooks, your application can sign up to be notified whenever certain events occur. For example, when a user uploads a asset, this action generates an event. With the right webhook in place, your application is instantly notified that this event happened.
Please refer to the Adobe Developer Console documentation on how to Add Events to a project
To start receiving events, you create an event registration specifying a webhook URL and the types of events you want to receive. Each event will result in a HTTP request to the given URL, notifying your application. This guide provides an introduction to webhooks.
Getting started
An Event is a JSON object that describes something that happened. Events originate from Event Providers. Each event provider publishes specific types of events, identified by an Event Code. A Webhook URL receives event JSON objects as HTTP POST requests. You start receiving events by creating an Event Registration, providing a name, description, webhook URL, and a list of Event Types you are interested in.
Webhook example
Acme Inc. wants to be notified when a new file is uploaded to Adobe Creative Cloud Assets, so it creates the following event registration:
Copied to your clipboard{"name": "Acme Webhook","description": "Listen for newly created files","webhook_url": "https://acme.example.com/webhook","events_of_interest": [{"provider": "ccstorage","event_code": "asset_created"}]}
Now when a file is uploaded, Adobe I/O Events performs the following HTTP request:
Copied to your clipboardPOST https://acme.example.com/webhook HTTP/1.1content-type: application/json{"@id": "82235bac-2b81-4e70-90b5-2bd1f04b5c7b","@type": "xdmCreated","xdmEventEnvelope:objectType": "xdmAsset","activitystreams:published": "2016-07-16T19:20:30+01:00","activitystreams:to": {"xdmImsOrg:id": "08B3E5CE5822FC520A494229@AdobeOrg","@type": "xdmImsOrg"},"activitystreams:generator": {"xdmContentRepository:root": "http://francois.corp.adobe.com:4502/","@type": "xdmContentRepository"},"activitystreams:actor": {"xdmAemUser:id": "admin","@type": "xdmAemUser"},"activitystreams:object": {"@type": "xdmAsset","xdmAsset:asset_id": "urn:aaid:aem:4123ba4c-93a8-4c5d-b979-ffbbe4318185","xdmAsset:asset_name": "Fx_DUKE-small.png","xdmAsset:etag": "6fc55d0389d856ae7deccebba54f110e","xdmAsset:path": "/content/dam/Fx_DUKE-small.png","xdmAsset:format": "image/png"},"@context": {"activitystreams": "http://www.w3.org/ns/activitystreams#","xdmEventEnvelope": "https://ns.adobe.com/xdm/common/eventenvelope#","xdmAsset": "http://ns.adobe.com/xdm/assets/asset#","xdmImsOrg": "https://ns.adobe.com/xdm/ims/organization#","xdmContentRepository": "https://ns.adobe.com/xdm/content/repository","xdmAemUser": "https://ns.adobe.com/xdm/aem/user#","xdmCreated": "https://ns.adobe.com/xdm/common/event/created#"}}
Your first webhook
Before you can register a webhook, the webhook needs to be online and operational. If not, then the event registration will fail. So you need to take care of setting that up first. Your webhook must be hosted on a server. For development, you may use localhost along with a tool like ngrok (see below).
For production, your webhook needs to:
- Be accessible from the internet (not using localhost)
- Be reachable over HTTPS
- Correctly respond to a "challenge" request
You may reuse/fork our Sample Webhook in Node.js
The challenge request
Synchronous validation
When creating an event registration using a webhook, Adobe I/O Events will first try to verify that the URL is valid. To do this, it sends an HTTP GET request, with a challenge query parameter. The webhook should respond with a body containing the value of the challenge query parameter.
Request
Copied to your clipboardGET https://acme.example.com/webhook?challenge=8ec8d794-e0ab-42df-9017-e3dada8e84f7
Response
You can either respond by placing the challenge value directly in the response body:
Copied to your clipboardHTTP/1.1 200 OK"8ec8d794-e0ab-42df-9017-e3dada8e84f7"
or by responding with a JSON object, including the correct content-type header:
Copied to your clipboardHTTP/1.1 200 OKContent-type: application/json{"challenge":"8ec8d794-e0ab-42df-9017-e3dada8e84f7"}
Typically, you would build your webhook to respond to the Adobe challenge in a method to handle HTTP GET requests, and then include another method for handling the HTTP POST requests that will be coming from Adobe containing actual event payloads. For testing purposes, you can start with something as simple as this PHP script:
Copied to your clipboard<?phpheader('Content-Type: text/plain');echo $_GET['challenge'];?>
Note: Make sure your response is given in the correct content type. If your webhook script places the challenge value directly in the response body, make sure it's returned as plain text (text/plain). For a JSON response, make sure it's application/json. Returning a response in the incorrect content type may cause extraneous code to be returned, which will not validate with Adobe I/O Events.
Asynchronous validation
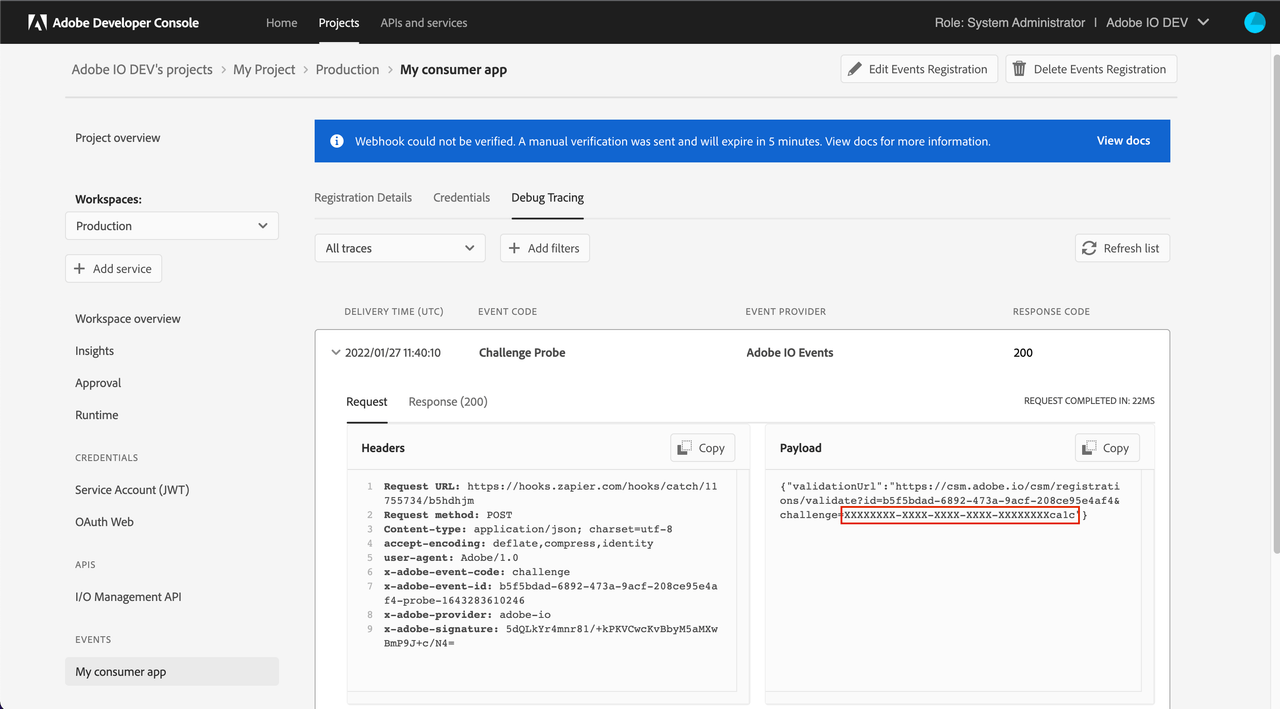
When the webhook fails to respond appropriately to the challenge request, Adobe I/O Events sends an HTTP POST request with a body containing a custom URL for manual validation.
Copied to your clipboardPOST https://acme.example.com/webhook HTTP/1.1content-type: application/json{"validationUrl": "https://csm.adobe.io/csm/registrations/validate?id=<guid1>&challenge=<guid2>"}
To complete verification, you need to send a GET request to it using a web browser/cURL or any simple REST client.
Copied to your clipboardcurl -L -X GET 'https://csm.adobe.io/csm/registrations/validate?id=<guid1>&challenge=<guid2>'
The custom URL is valid for 5 minutes. If the validation is not completed within 5 minutes, your event registration is marked Disabled.
Your webhook must respond to the POST request with an HTTP status code of 200 before it can be put in the asynchronous validation mode. In other words, if the webhook responds with a 200, but doesn't respond with a body containing the challenge, it is switched to asynchronous validation mode. If there is a GET request on the validation URL within 5 minutes, the event registration is marked Active.
Please note that for security reasons we obfuscate the validation URL in the debug tracing tab.
So, the only way to intercept the original validation URL is if you own the webhook server (you could simply log all requests).
Testing with ngrok
Ngrok is a utility for enabling secure introspectable tunnels to your localhost. With ngrok, you can securely expose a local web server to the internet and run your own personal web services from your own machine, safely encrypted behind your local NAT or firewall. With ngrok, you can iterate quickly without redeploying your app or affecting your customers.
Among other things, ngrok is a great tool for testing webhooks. Once you've downloaded and installed ngrok, you run it from a command line, specifying the protocol and port you want to monitor:
Copied to your clipboardngrok http 80

In the ngrok UI, you can see the URL for viewing the ngrok logs, labeled "Web Interface", plus the public-facing URLs ngrok generates to forward HTTP and HTTPS traffic to your localhost. You can use either of those public-facing URLs to register your Webhook with Adobe I/O, so long as your application is configured to respond on your localhost accordingly. Once your testing phase is complete, you can replace the ngrok URL in your Adobe I/O integration with the public URL for your deployed app.
Create a project in the Adobe Developer Console
Integrations are now created as part of a project within the Adobe Developer Console. This requires you to have access to the Console in order to create a project, add events to your project, configure the events, and register your webhook.
For detailed instructions on completing these steps, please begin by reading the Adobe Developer Console Getting Started guide.
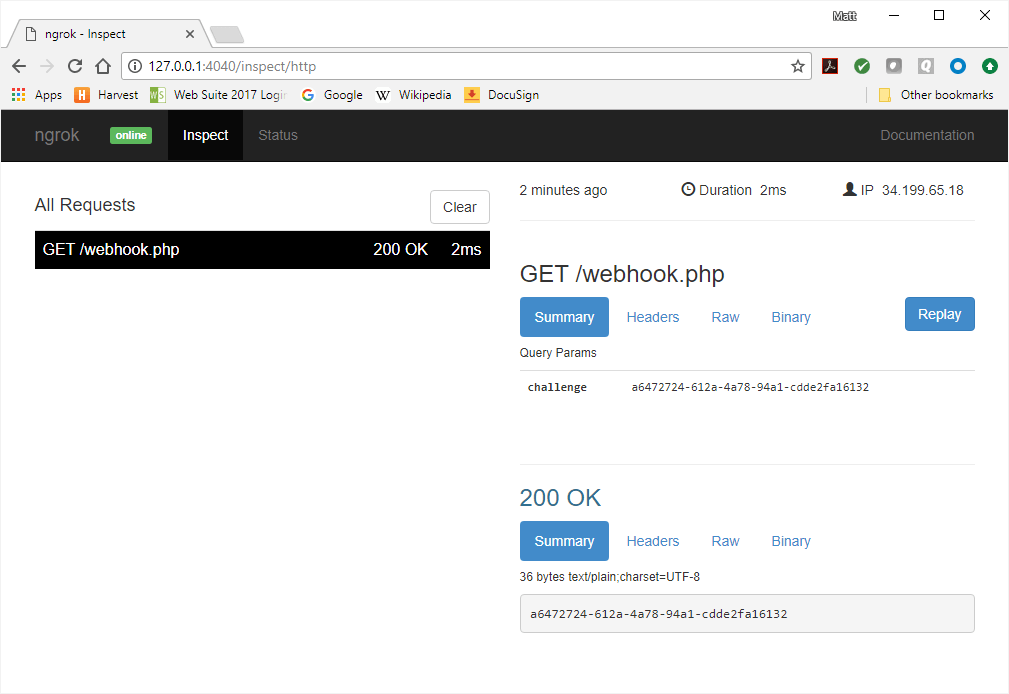
Once you have completed the event registration, check the ngrok log. You should see a GET request, including the challenge that was passed along in the URL.
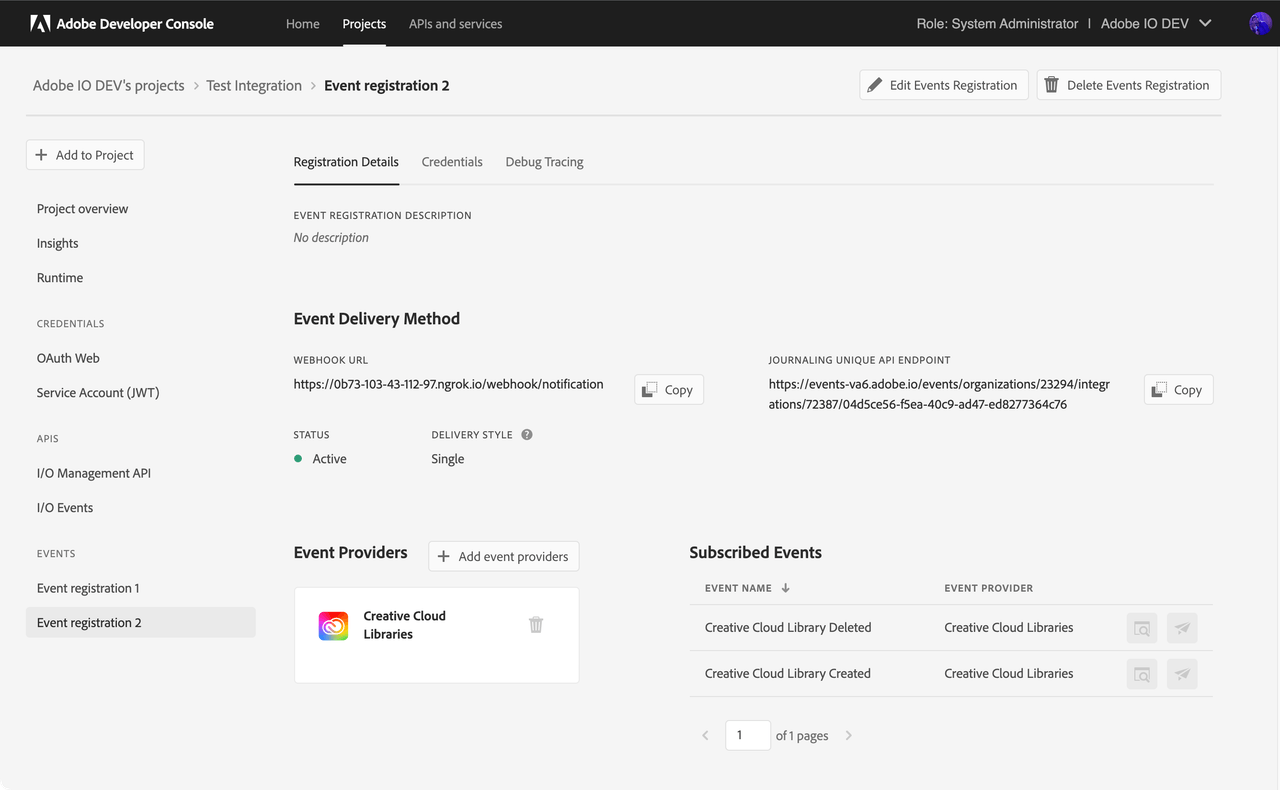
In the Adobe Developer Console, you will be taken to the Registration Details page once the event registration is complete.
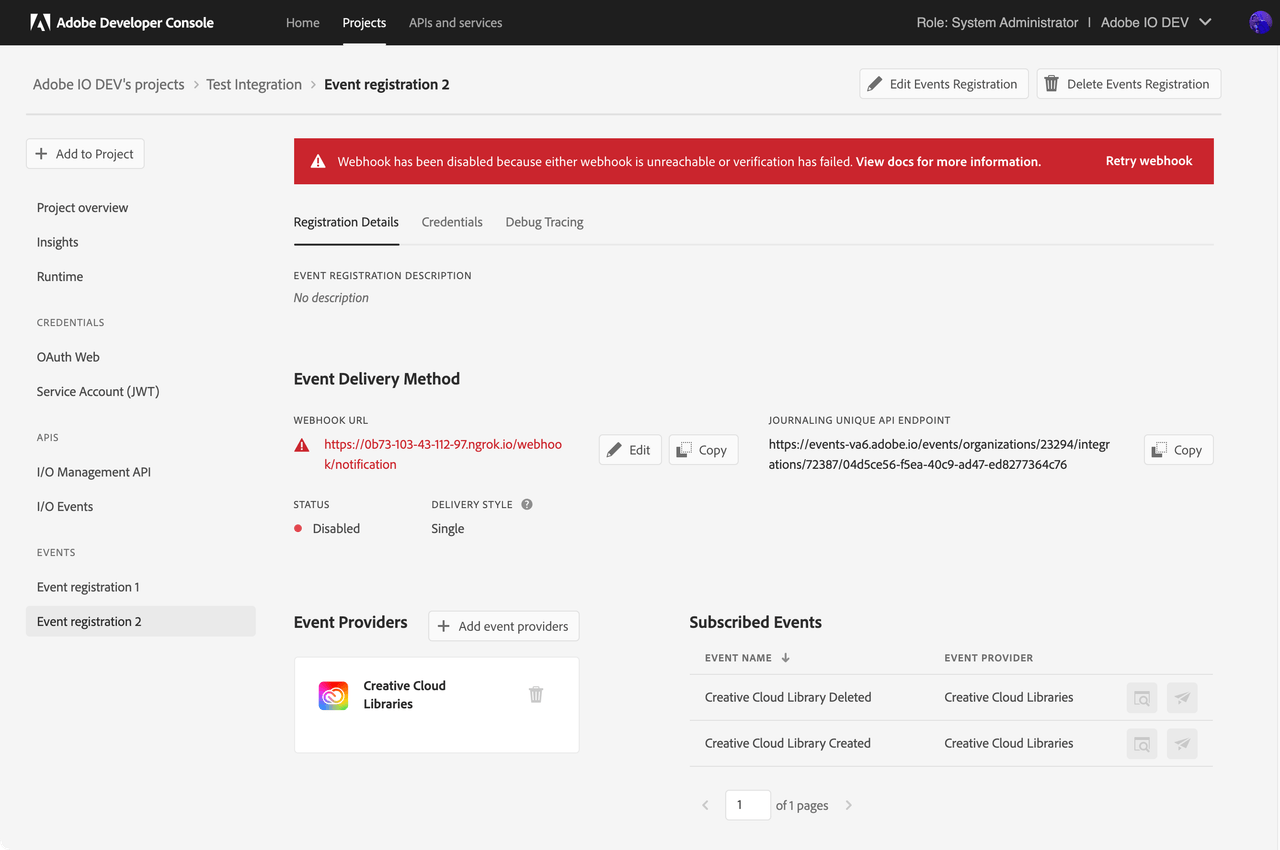
The Status of the registration should show as Active. If the registration shows as Disabled please see the troubleshooting section that follows.
Troubleshooting Unstable/Disabled Registration Status
If you made an error transcribing the webhook URL, Adobe I/O Events' test of your webhook would have failed, resulting in a Disabled status.
In general, Adobe I/O Events will always confirm that your webhook received an event by means of the response code your webhook sends to each HTTP POST request.
If Adobe I/O Events fails to receive a successful response code from your webhook within 10 seconds, it retries the request, including a special header x-adobe-retry-count. This header indicates how many times the delivery of an event or a batch of events has been attempted.
Please note that if an event delivery fails with a response status code of 400 Bad Request or 505 HTTP Version Not Supported, then those events are not retried.
Adobe I/O Events will keep on retrying delivery to your webhook for 24 hours using exponential and fixed backoff strategies. The first retry is attempted after 1 minute and the period between retries doubles after each attempt, but is at most 15 minutes (see below table outlining the retry pattern).
| Retry Attempt | 1 | 2 | 3 | 4 | 5 | 6 | 7 | ... |
|---|---|---|---|---|---|---|---|---|
Retry After Interval | 1m | 2m | 4m | 8m | 15m | 15m | 15m | ... |
Please note that above retry intervals are not guaranteed and may vary in few exception scenarios.
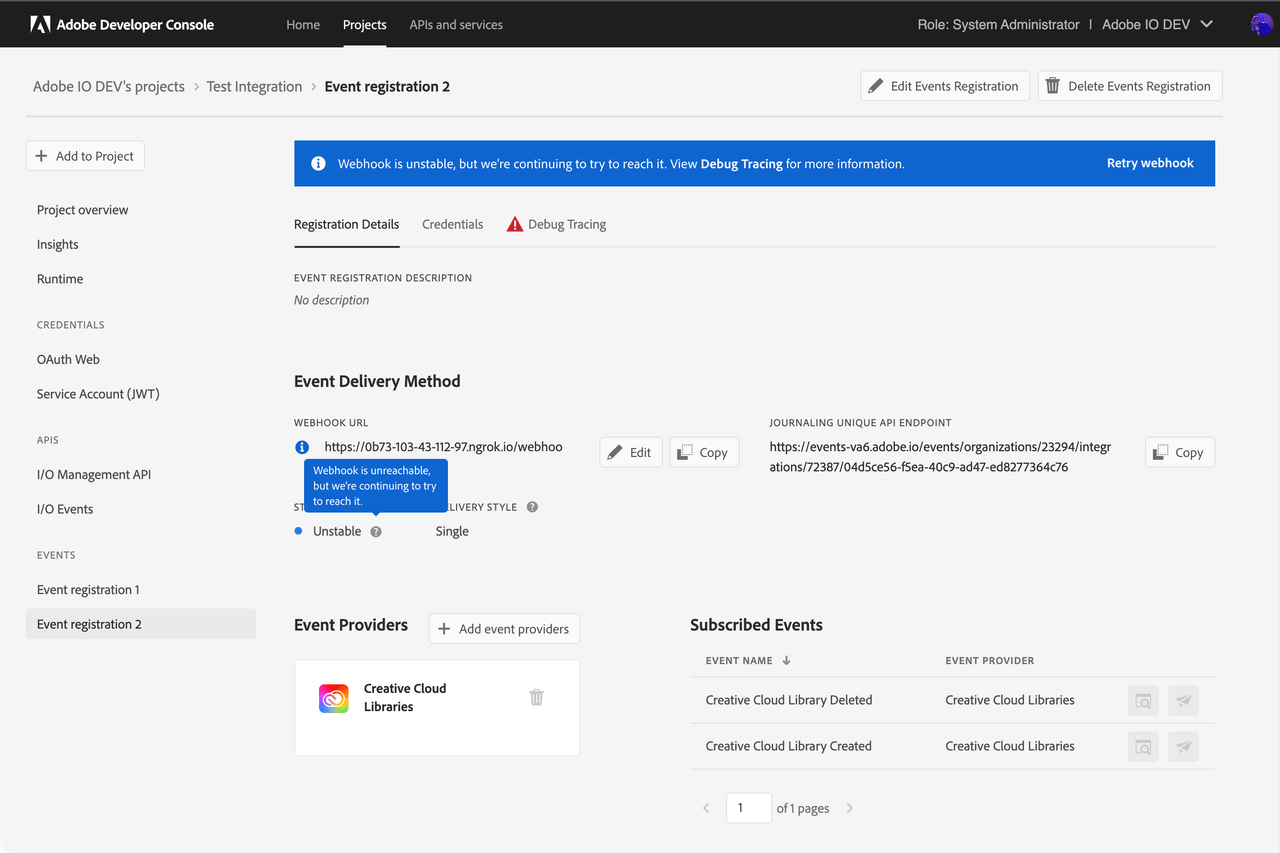
If an event isn't delivered after 2 hours of retries, Adobe I/O Events marks the event registration as Unstable, but still keeps on attempting delivery. This gives you sufficient time to restore your webhook, and avoid it from getting marked as Disabled. Once restored, it will be marked as Active on the next successful event delivery.
If all retry attempts get exhausted and the event still isn't delivered (webhook not responding or responding with a non 2XX response), Adobe I/O Events drops the events, marks the event registration as Disabled, and stops sending any further events.
To restart the flow of requests, fix the problem preventing your webhook from responding. Then, log into the Adobe Developer Console and edit your events registration. This re-triggers a webhook challenge request, and eventually a re-activation of your event registration.
Note: While your event registration is marked Disabled, Adobe will continue to log events in your Journal, allowing you to retrieve all events for the past 7 days (see our Journaling documentation).
Unstable Event Registration
Disabled Event Registration
Receiving events for users
Once your integration is set up, and your webhook is in place; to receive events, your integration needs to connect to its event provider on behalf of its user. This requires authentication; see OAuth Integration.
Depending on your scenario and the Adobe service you're targeting, you may have to enable different types of authentication; see the Adobe I/O Authentication Overview for more information on how to set up your app for authentication with your users.
For example for Creative Cloud Libraries events, you will need to add the Creative Cloud Libraries as a service, then use the OAuth 2.0 protocol to build an interface for your user to log into your app, and give your app authorization to access Creative Cloud Assets. Once your app is authenticated, Adobe will begin to push events to your integration's webhook via HTTP POST messages.
Follow adding an API that uses OAuth to a Console project guide, and select Creative Cloud Libraries from the list of available APIs.
Adobe Consent API
To authenticate your app to receive events on your users' behalf (and for development purposes), you must provide consent via the Adobe Consent API:
Copied to your clipboardhttps://ims-na1.adobelogin.com/ims/authorize/v1?response_type=code&client_id=api_key_from_console&scope=AdobeID,openid,creative_sdk
You will need to replace api_key_from_console with the Client ID value provided on the Credentials tab of the Registration Details in your Console project.
A good utility for testing this process is the Adobe IMS OAuth Playground. Follow instructions in the FAQ.
Once all of the above steps are completed, try logging into Creative Cloud Assets using the same Adobe ID as the one you used for Adobe Developer Console and create a library. If all went well, then a cc_library_created event will be successfully delivered to your webhook.
Security Considerations
Your webhook URL must necessarily be accessible from the open internet. This means third-party actors can send forged requests to it, tricking your application into handling fake events.
To prevent this from happening, Adobe I/O Events has a robust event validation process in place as defined below that allows users to secure their webhook.
Improved and Resilient Security Verification for Webhook Events
For a more robust and reliable verification, Adobe I/O Events adds below security validations for events delivered to your webhook.
- Adobe I/O Events sends an additional field of
recipient_client_idas part of your event payload. - The event payload is signed digitally using a fixed public/private key pair generated by Adobe I/O Events. The digital signature is sent as a webhook request header.
- Adobe I/O Events sends the relative path of public key, which is served from our fixed Adobe domain static.adobeioevents.com, as webhook request headers.
How it strengthens security
- Adobe I/O Events uses the same public/private key pair generated by itself to sign all event payloads flowing through its pipeline. The public keys are also hosted at its own domain i.e. static.adobeioevents.com. This ensures that any malicious user can't use their own arbitrary public/private key pair to sign an event payload and send forged requests to your webhook endpoint.
- Adobe I/O Events sends the event payload with an additional field of
recipient_client_id. The webhook consumer can match the payload's client id with their own client id to verify if they are the actual recipient of the event. This ensures they don't receive events they haven't subscribed for.
I/O Events uses two public-private key pairs and signs your event payload using two digital signatures following the steps below.
- a message digest of your event payload is computed by applying
rsa-sha256hash function algorithm - the digest is then encrypted using the I/O Events private key to generate the digital signature
I/O Events sends the 2 digital signatures as webhook request headers and they are available via the header fields
x-adobe-digital-signature-1 and x-adobe-digital-signature-2 respectively.
I/O Events also sends 2 public keys corresponding to the private keys used to generate the digital signatures. These public keys are publicly accessible using our Adobe domain static.adobeioevents.com. I/O Events sends the relative paths of the public keys i.e. /prod/keys/pub-key-<random-uuid>.pem via the webhook request header fields x-adobe-public-key1-path and x-adobe-public-key2-path respectively.
As mentioned earlier, I/O Events adds an additional json field recipient_client_id to your payload. See the sample payload after the transformation that I/O Events sends to your webhook.
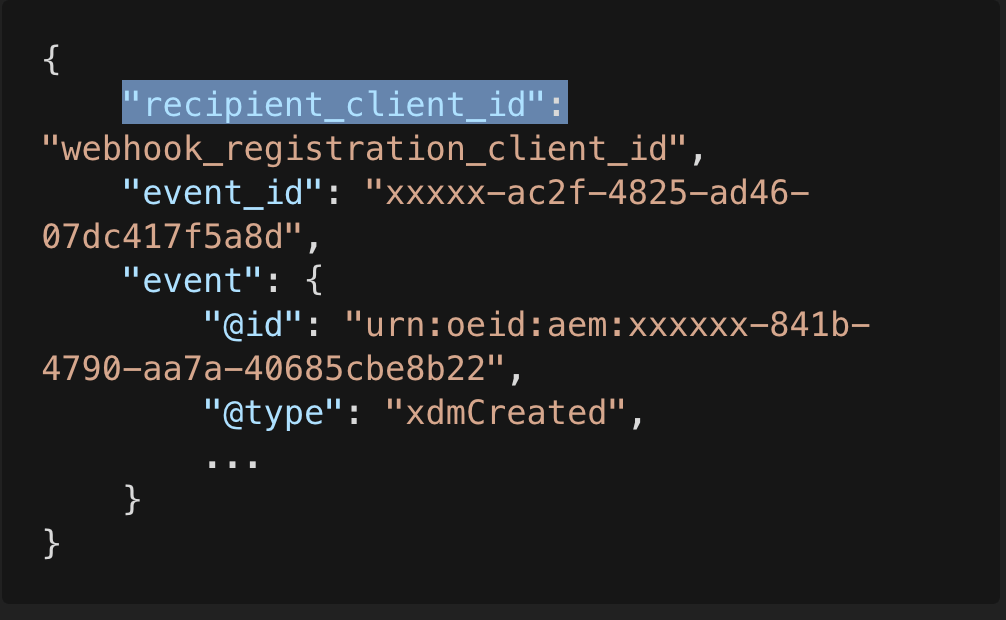
Upon receiving a request, you must do the below for leveraging the enhanced security measures
- verify you are the actual recipient of the event using the new
recipient_client_idfield available in the payload - once verified, your app should fetch the public key by forming and validating the url using the Adobe domain static.adobeioevents.com, and the relative path received from the request header
- after downloading the public key set it in the cache with cache expiry of
not more than 24h.
To note, Adobe I/O Events doesn't send any cache-control header in the webhook request, so you must set up your cache configuration as mentioned above.
You can also consider implementing a retry mechanism to call public key urls in case of any transient error that might occur.
Verifying the Signature
Once you have the PEM public keys, you can now verify the digital signatures by following the steps as below:
- Create the PublicKey object using the pem public key.
- Create a
Signature(for java apps) orcrypto-> Verify (for nodeJS apps) instance using thersa-sha256hashing algorithm. - Supply raw event payload to the instance created in above step.
- Use the public key and decoded signature to verify.
- Do the above for both the signatures and if any one of the signature validations is successful, then the event is valid.
A pictorial block diagram for the signature validation steps above that you should follow:

Refer to this signature verification method of the events sdk (nodeJS based) to understand the above signature validation steps for your webhook app.
For Java based webhook applications, one can verify signature using the below code snippet.
Copied to your clipboardpublic boolean verifySignature(String message, String signature) throws Exception {byte[] data = message.getBytes(UTF_8);// signature generated at I/O Events side is Base64 encoded, so it must be decodedbyte[] sign = Base64.decodeBase64(signature);String keyFile = "public_key_pem_file.pem";Signature sig = Signature.getInstance("SHA256withRSA");sig.initVerify(getPublic(keyFile));sig.update(data);return sig.verify(sign);}//Method to retrieve the Public Key from a fileprivate PublicKey getPublic(String filename) throws Exception {String key = new String(Files.readAllBytes(new File(filename).toPath()));String publicKeyPEM = key.replace("-----BEGIN PUBLIC KEY-----", "").replaceAll(System.lineSeparator(), "").replace("-----END PUBLIC KEY-----", "");byte[] encoded = Base64.decodeBase64(publicKeyPEM);KeyFactory keyFactory = KeyFactory.getInstance("RSA");X509EncodedKeySpec keySpec = new X509EncodedKeySpec(encoded);return keyFactory.generatePublic(keySpec);}
Quotas
There is an upper limit on the number of registrations that you can create. Following table lists the applicable quotas -
| Maximum number of registrations | Grouping level | Adjustable | Description |
|---|---|---|---|
2500 | IMS Org | No | A maximum of 2500 event registrations (webhook or journal) can be created for an IMS Org. This quota cannot be adjusted. |
10 | IMS Credential (client Id) | Yes | A maximum of 10 event registrations can be created for an IMS client-id. To keep the number of registrations in check, we recommend subscribing to multiple event types in a registration. If there are a large number of event types that need to be subscribed and adding all of them in a single registration is not desirable, then consider subscribing "related" event types together in a registration. Event types can be grouped based on the domain, estimated traffic scale, development effort required to process the events, or any other factor. I/O Events is designed to support a small number of registrations in a Adobe Developer Console Project. Having a small number of registrations in a Project provides better resiliency and contributes to the cost-effectiveness of the overall architecture (as it is more likely for the webhooks to receive events in batches). In addition, having a small number of registrations minimizes the development and operational overheads associated with managing the event-consumer webhooks/runtime-actions.If you have use cases that require creating a large number of event registrations in a Project, then please reach out to us via I/O Events Forum. We'd like to understand them in more detail and we will be happy to recommend an appropriate event-subscription pattern. |


